In SPC, an upsell funnel begins with your first upsell offer. Instead of directing customers to the thank you page after they purchase your main product, you can connect the buy button to the upsell funnel so they are redirected to your 1st upsell offer. They can take up the upsell offer or decline. You can offer additional upsells or downsells at each step.
Let’s say you want to build an upsell funnel where you offer 2 upsells.
Say these are the products.
- Your main product – Product 1.
- Your upsell products – Upsell Product 1 and Upsell Product 2.
Here are the steps to build an upsell funnel
Step 1: Create your main product and your upsell products in DAP first.

Step 2. Create a buy button for your main product in SPC >> Buttons >> Buy Buttons page.
You can configure it to send buyers to your thank you page upon purchase.
Step 3. Create 2 different upsell pages in WordPress >> Pages.
One for upsell 1 and another for upsell 2 product.
Don’t publish any yes/no buttons on these pages yet.
Step 4. Build the funnel
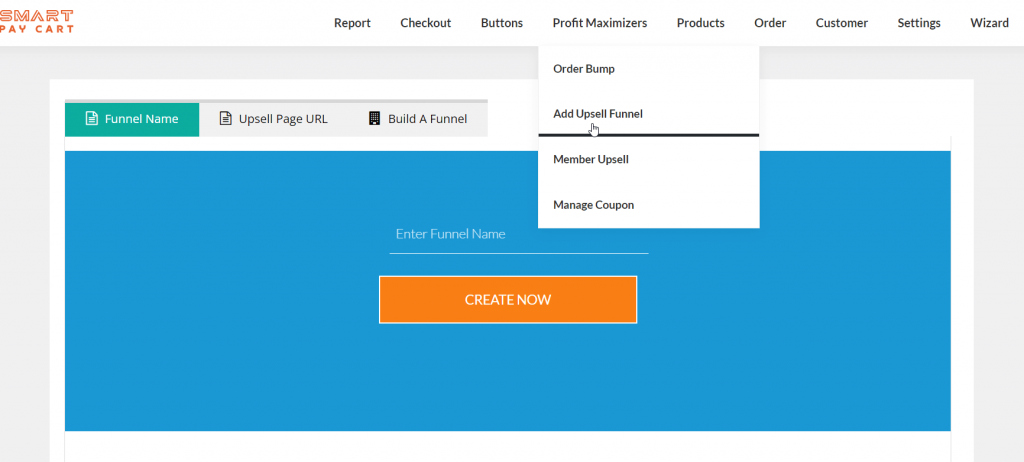
1. Go to SPC >> Profit Maximizers >> Add Upsell Funnel page
2. Click on Add New
3. Enter a name for your funnel

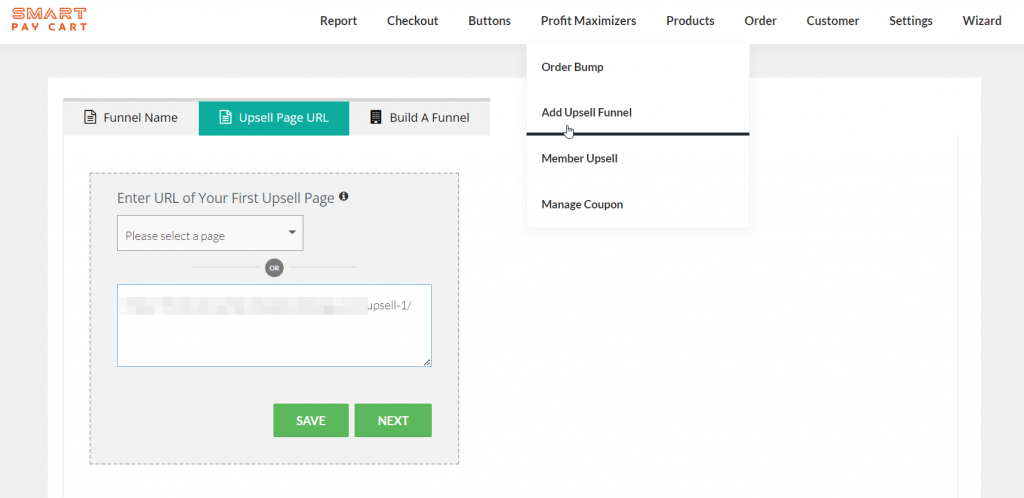
4. Select the first upsell URL.

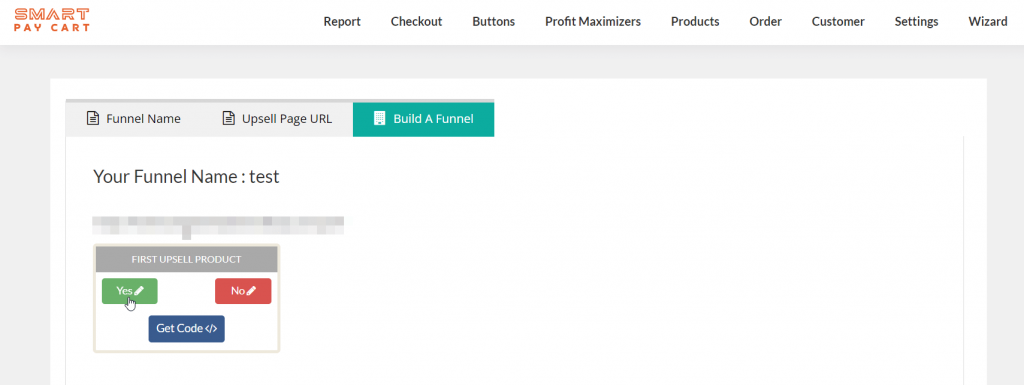
5. It will bring you to the funnel builder.

6. Setup the “YES” Button Flow. Click on the “YES” button to build the “yes” part of the first upsell offer.
When the “Yes” button is clicked, select the product for the upsell on that page. If the customer accepts the upsell offer, check if there’s another upsell. If there is, redirect them to the second upsell page. If not, send them to the thank you page.

8. Click on Save. Close the popup.
9. You will now find the “yes” part of the funnel in the builder.
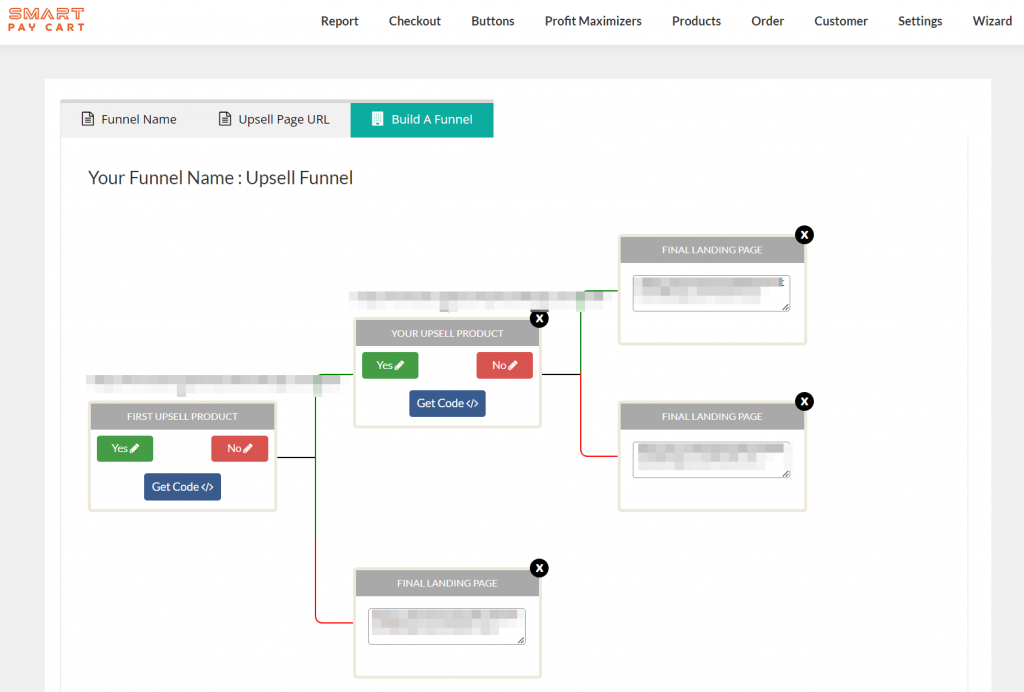
10. Complete the rest of the funnel. It will look something like this when all nodes are complete.

Step 5: Get the Yes/ No Links
In the funnel builder, click on Get Code to get the Yes and No button links.
Now edit each upsell page.
Add a “Yes, I am interested in this” button and link it to the yes link from the funnel builder. Add a “No, Thanks” link and link it to the “no” link from the funnel builder.
Step 6: Connect buy button to the upsell funnel
Now you can edit the buy button and in the landing page tab, connect it to your upsell funnel. Upon successful purchase, buyers will be sent to the first upsell page.
Step 7: Test
Set the buy button to sandbox mode.
In a private window, complete the purchase of the main product. You should be directed to the first upsell page.
Click “Yes” to go to the second upsell page.
On the 2nd upsell page, click “Yes” again. SPC will redirect to the thank you page.
Now you can check DAP Payment > Orders to verify three separate orders (main product, upsell 1, upsell 2). And check DAP Members > Manage to confirm the buyer has access to all three products.


