Integrating External Platforms with DAP Using DAPConnect
You can integrate your platform with Digital Access Pass (DAP) to automatically grant access to a product in DAP when a subscriber signs up on an external platform. This can be achieved using automation platforms like Pabbly or Zapier alongside DAPConnect.
Important Notes:
- This integration works only for FREE products in DAP.
- PAID products in DAP are not supported for this type of integration.
Steps to Set Up the Integration
Step 1: Install DAPConnect
Download the latest DAPConnect plugin:
Log in to your members’ area: Wicked Cool Plugins – Login.
Download the latest version of the DAPConnect zip file.
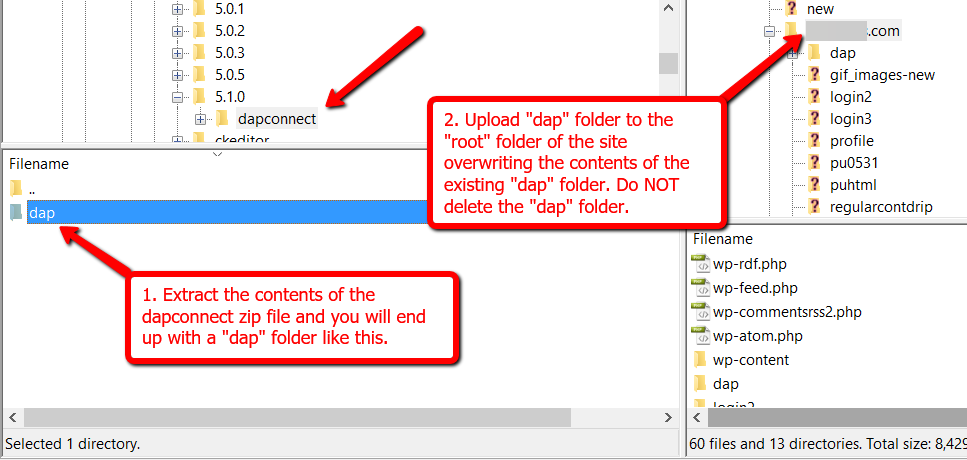
Extract the zip file:
Unzip the downloaded file on your computer.
Upload the DAP folder:
Navigate to the “root” folder of your website via FTP or file manager.
Upload the extracted dap folder, overwriting the existing contents of the dap folder

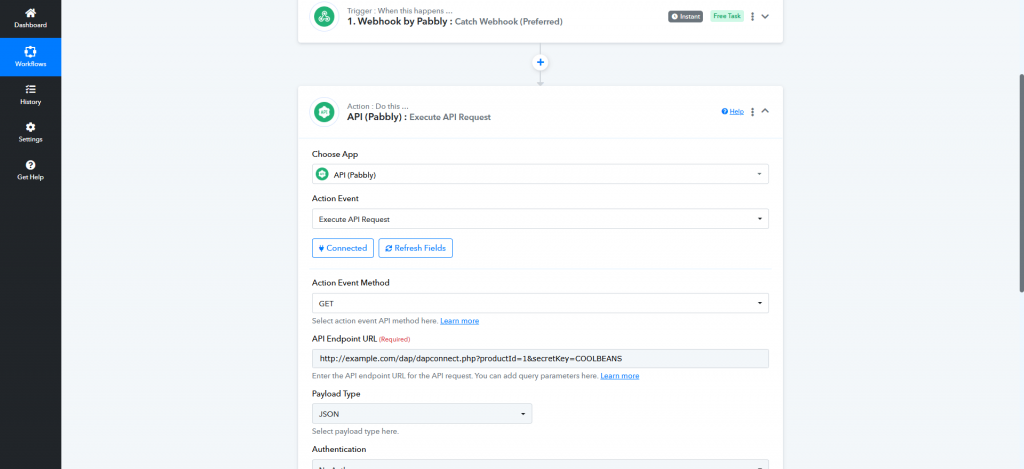
Step 2: Configure the Action URL in Your Automation Platform
Set the Action URL in your automation platform (e.g., Zapier or Pabbly) using the following format:http://YOURSITE.com/dap/dapconnect.php?productId=[YOUR DAP PRODUCT ID]&secretKey=[YOUR SECRET KEY].
Replace placeholders with your website’s domain, the DAP product ID, and the secret key. For example:http://example.com/dap/dapconnect.php?productId=1&secretKey=COOLBEANS
Important:
Make sure the secretKey value you set here matches the secret key you have set in DAP setup >> config page >> Payment / Key tab.

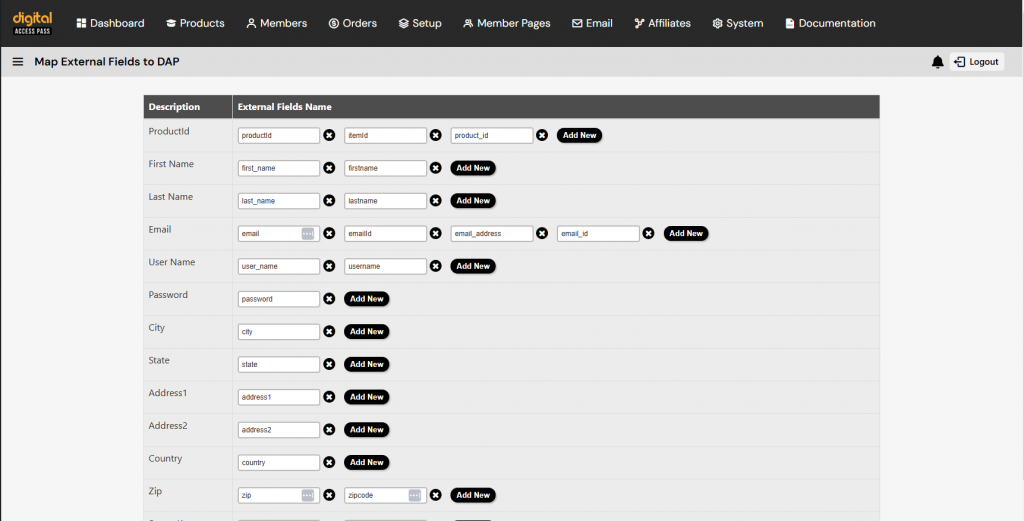
Step 3: Complete Data Mapping
Log in to your DAP Admin area and navigate to Setup → Data Mapping. Map the field names sent by your automation platform to the corresponding fields in DAP.

Step 4: That’s it! The setup is complete.
Now you can test!


