Watch the video where you’ll learn step-by-step, how to create, protect
and offer – FREE and PAID Digital Products – using the NEW DAP!
Creating digital products, courses, and memberships is easier than ever with DAP.
Follow these simple steps to get started:
Step 1: Navigate to the DAP Products Page
Step 2: Click on the ‘Create New’ button’.
This will open a popup window.

Step 3: Choose what you want to create (e.g., product, membership, etc.).

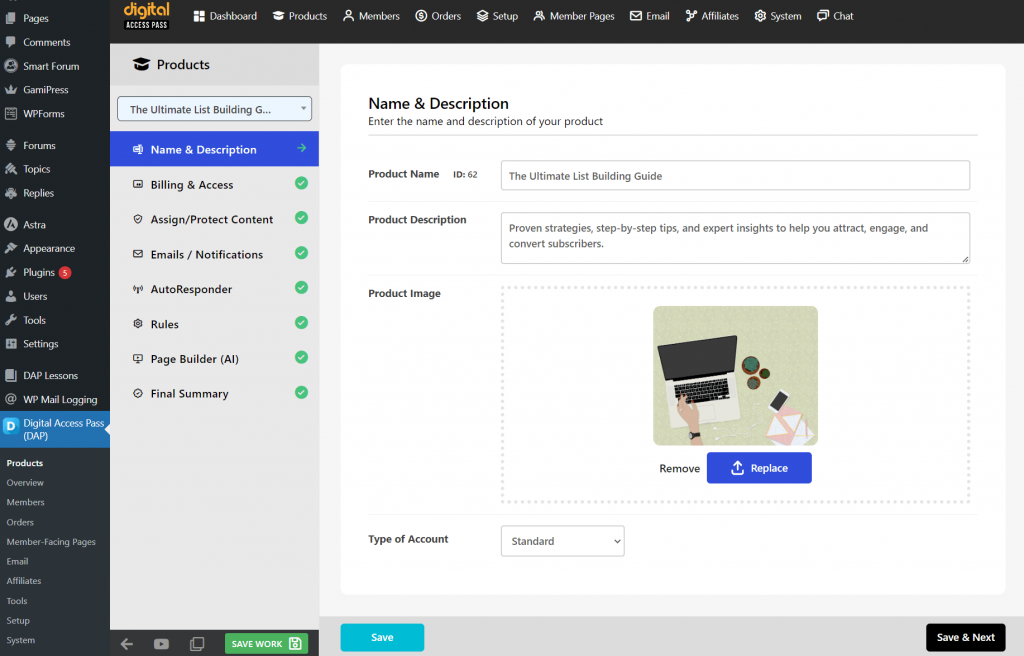
Step 4: Product Title, Description & Image
Begin by entering a clear title and a short description for your product. Upload an image for your product.
Step 5: Billing & Access
Define your pricing structure – whether it’s a one-time fee, subscription, or installment plan. Clearly outline how members will access the product, setting expectations for duration and renewal options.
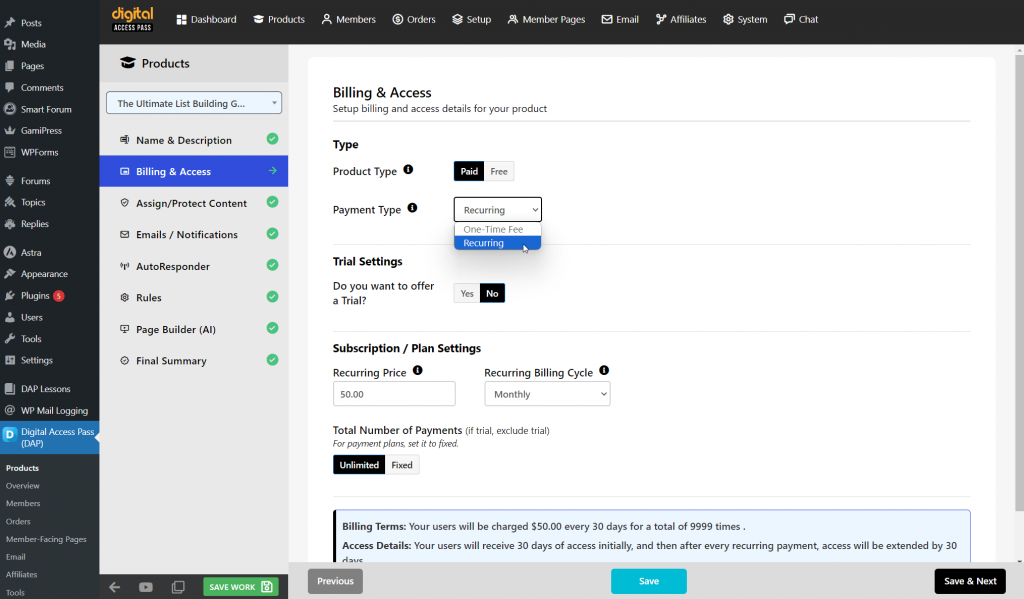
Here are the different billing options:
Free
No payment is required, ideal for lead magnets to attract users.
Paid:
One-time payment for lifetime or limited-time access to a product or course.
Free Trial:
Users enjoy free access to the product for a limited time (e.g., 7 days). After the trial, they are automatically charged unless they cancel.
Paid Trial:
Similar to a free trial, but users pay a nominal fee (e.g., $1 for 7 days). After the trial, they are automatically charged the recurring amount unless they cancel.
Subscription:
Users make recurring payments at regular intervals (monthly or yearly) to maintain access. This model is commonly used for memberships, ongoing courses, and premium content.
Payment Plan:
Users can pay in installments, breaking the total cost into smaller, scheduled payments.
Access Duration
Limited Time:
Access for a specific period (e.g., 30 days).
Lifetime:
Permanent access without time limitations.
Step 6: Assign Content
Now you can assign/specify the materials and resources included with your product, such as downloadable files, videos, and WordPress content. You can also give access to other products using product chaining.
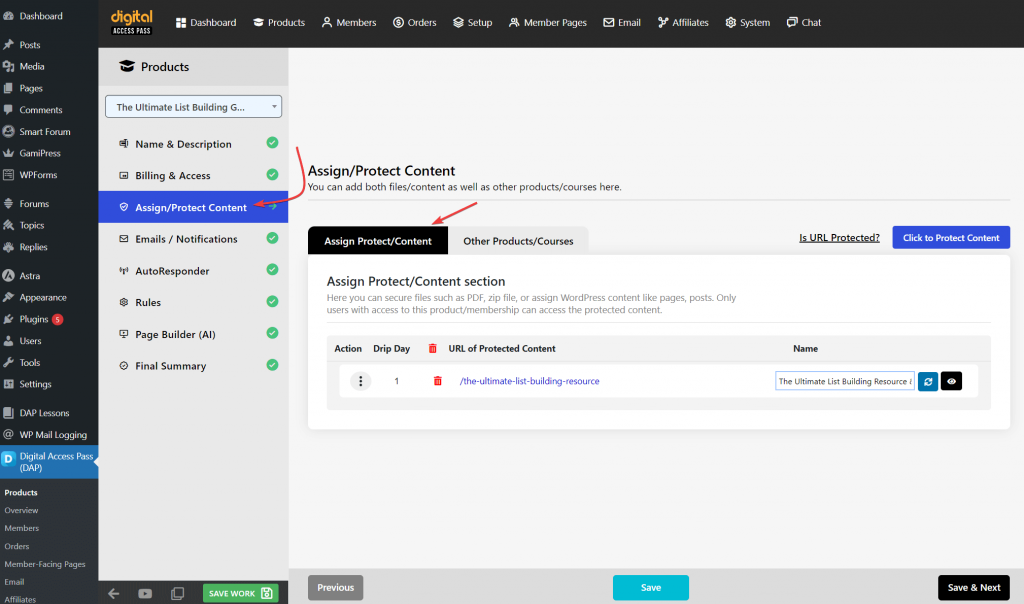
Also decide on your content delivery method, whether it will be available immediately upon purchase or released over time through drip-feeding.Downloadable resources
Templates, PDFs, Checklists, Worksheets
Media Resources
Videos, Audio Files
WordPress Content
WordPress Pages, Posts, Category Links, Custom Post Types:
Structured educational content or activities
Courses, Challenges
Set specific rules regarding how and when members can access the product content (e.g., immediate access, drip content over time). Configure content delivery (e.g., immediate access, drip-feed).
Step 7: Delivery Options
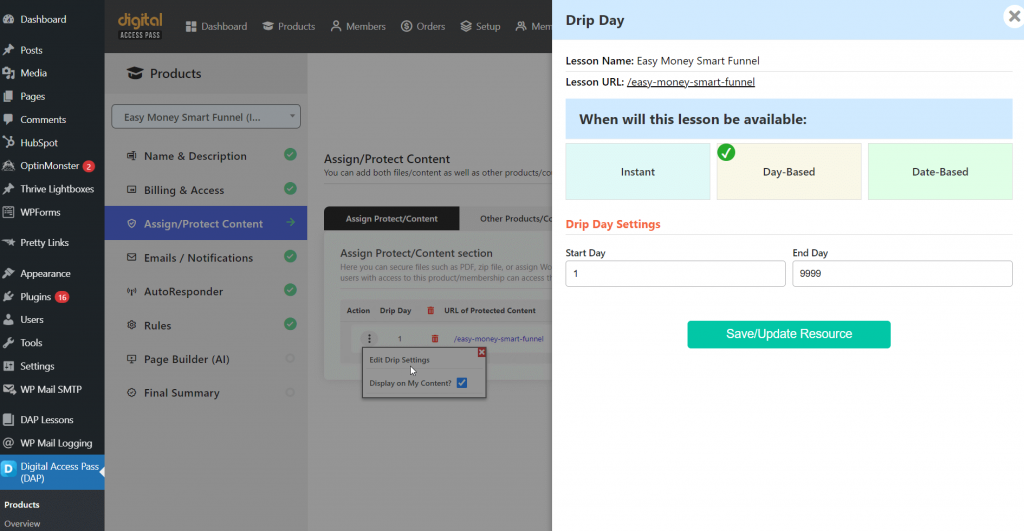
DAP offers flexible ways to deliver your digital products and courses to your audience.
Select the option that best fits your content strategy:
Instant Access:
Content available immediately after purchase.
Dripped Content:
Gradual content release over time.
Lesson Completion:
New content unlocked after completing a previous lesson.
Time-Spent on Lesson:
Access based on the time spent on a lesson.
Blocking Based on Quiz Results:
Content unlocked upon passing a quiz.
Step 8: Notifications
Create a warm and informative welcome email for new members. This email should include login details, an introduction to the product, and guidance on how to get started to help them feel supported from the very beginning.
Set up automations. Connect your product to your email platform, ensuring that new members are automatically added to the appropriate email lists for ongoing communication and engagement.
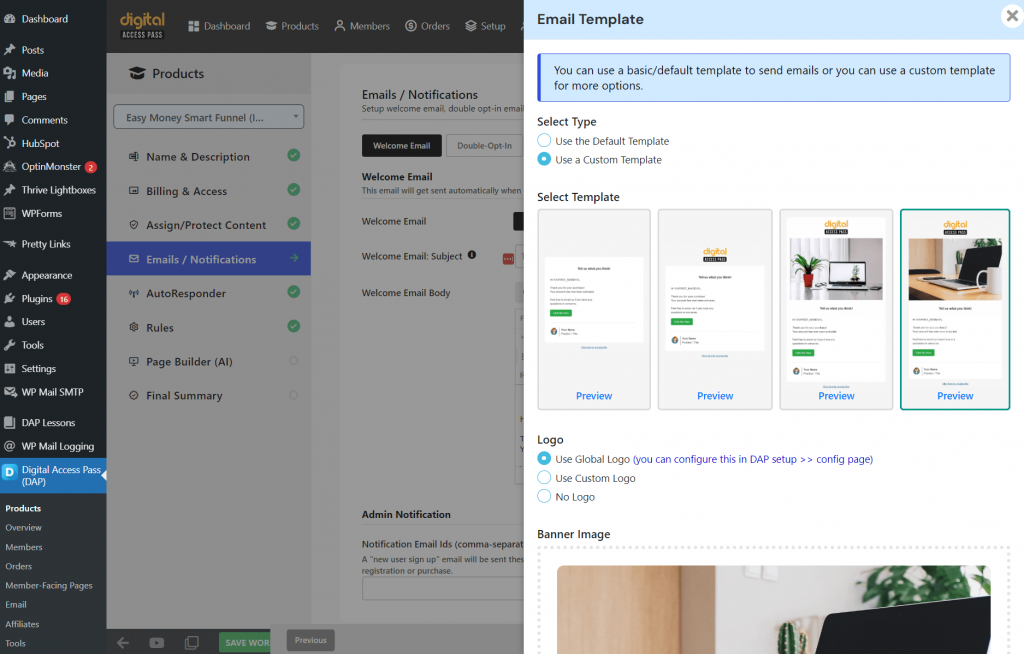
Step 9: Rules
Configure essential settings for your product, including login URLs, landing pages after login, and links to sales and product pages. These configurations will streamline access for your members.
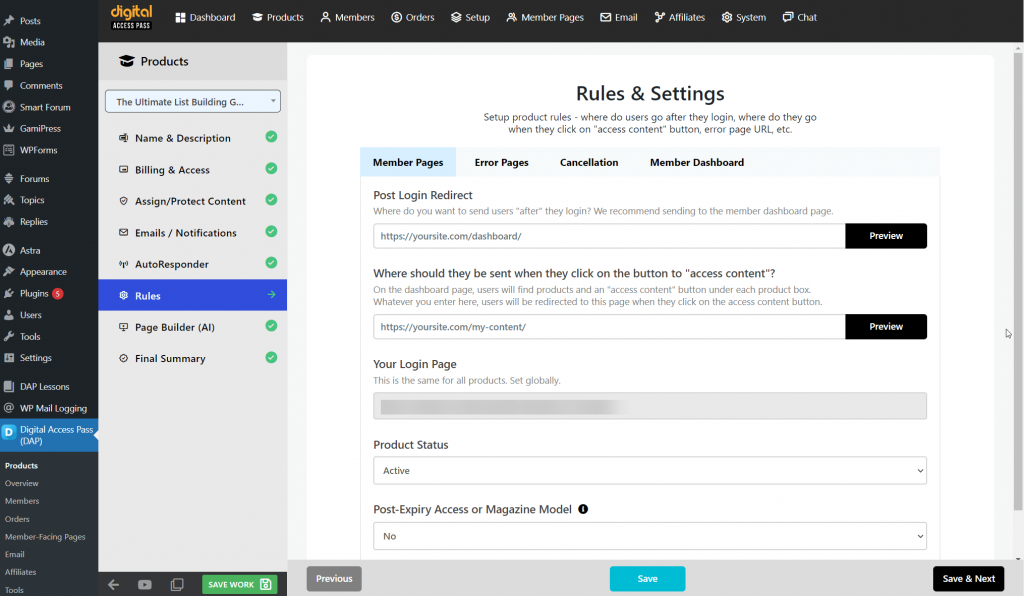
Here are the settings:
Post-Login URL
In the Rules/Settings tab of the product builder, you can configure where members should be redirected when they login. Here’s how login redirect works in DAP:
The product level post login will ONLY work if user has access to just 1 product. If the user has access to multiple products, ‘global’ post-login url that you have set under DAP setup -> config will be used.
Access Content Button URL
In the DAP Member Dashboard, each logged-in member will see a product box for every product they have access to. Under each product box, there’s an “Access Content” button that directs users to the available resources for that product. You have full control over where this button leads. You can choose to send users to a WordPress page that hosts the product’s content, link directly to a resource such as a PDF, or in the case of an online course, direct them to the first lesson or a specific module. This flexibility allows you to tailor the user experience based on the type of content you’re offering.
You can configure the URL of the “access content” button in the DAP Product Builder << Rules/Settings tab >> Access Content Button URL field.
Error Page URL
DAP automatically redirects users who don’t have access to your premium content to an error page. You can configure a global error page with a generic message explaining why access is restricted and how users can gain access. Additionally, you have the option to set up unique error pages for each product. This allows for more targeted messaging, providing specific instructions or offers related to that particular product.
Here’s how it works:
- If a piece of content is protected under just one product and a user without access tries to view it, DAP will send them to that product’s custom error page, if one is configured. If no product-specific error page is set up, they will be redirected to the global error page.
- DAP also supports protecting the same content under multiple products. In this case, if the user has access to any one of those products, they can view the content. However, if they don’t have access to any of the associated products, DAP will redirect them to the global error page.
This system ensures users receive relevant messaging while guiding them on how to unlock premium content.
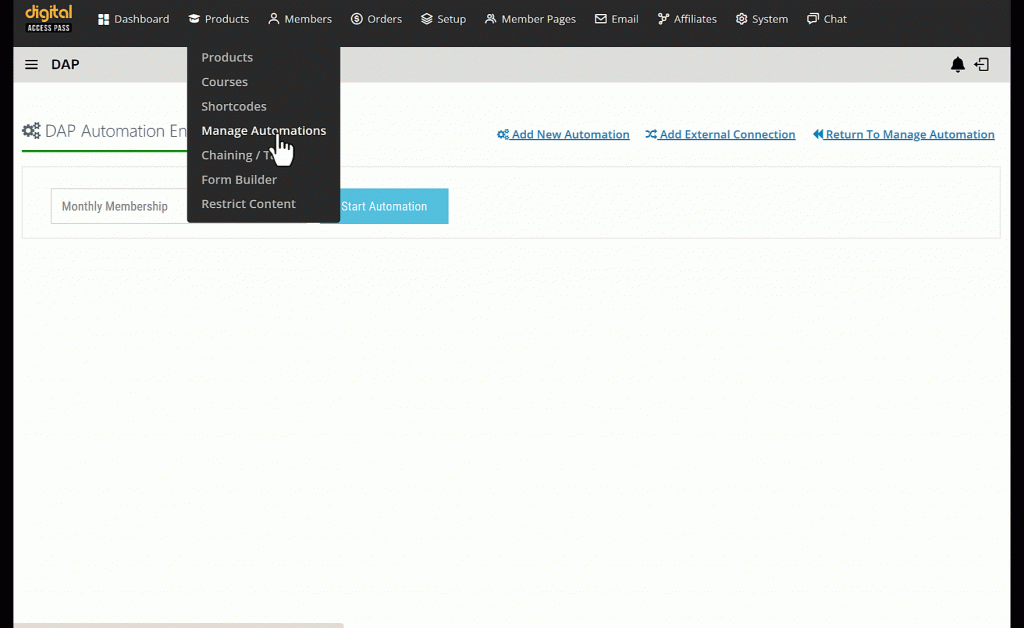
6. Automations
Set up automations. Connect your product to your email platform, ensuring that new members are automatically added to the appropriate email lists for ongoing communication and engagement.
Congrats! Your product is ready!
Next Steps?
- Create a sales page in WordPress.
- Create a payment button for the product.
- Publish it on your sales page.
- Test everything before you go live! Complete a purchase like your users would, check the welcome email, login and see if you can access the content! If all looks good, you are all set!
Page Builder
DAP comes with a sales page builder. You can use it to create a sales page and also generate a payment button. But if you want to create the sales page directly in WordPress, then you can simply enter the sales page URL in DAP Product Builder >> Page Builder tab.
If you use our shopping cart plugin for DAP called Smart Pay Cart, you can use DAP to automatically create a payment for your products using it’s SPC integration in the Page Builder tab. But it’s not a required step. You can create payment links directly in SPC, or in any cart platform that integrates with DAP, and publish it on your sales page.
That’s it! You product is ready!


