Creating digital products, courses, and memberships is easier than ever with DAP. Follow these simple steps to get started:
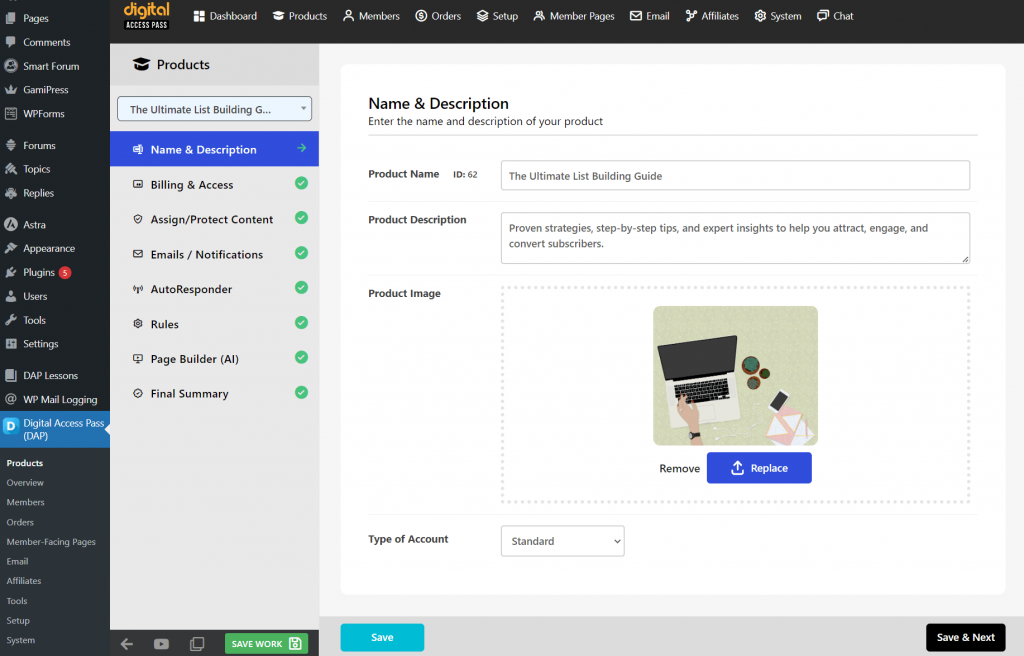
Step 1: Product Title, Description & Image
- Navigate to the DAP Products Page.
- Click on the ‘Create New’ Button. It will open a popup where you can enter title and description.
- Product Title: Enter a clear title for your free product.
- Description: Write a short description to attract users.
- Click on save. It will bring you to the DAP product builder.
- Image: Upload an image for your product.

Step 2: Billing & Access
Set billing type to FREE.
Access Duration
- Limited Time: Access for a specific period (e.g., 30 days).
- Lifetime: Permanent access without time limitations.
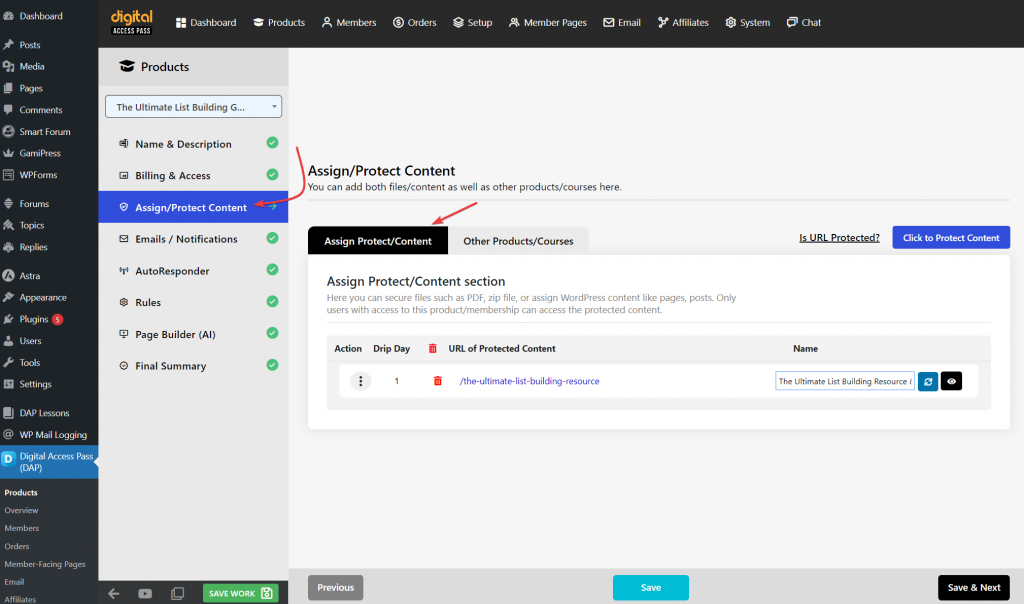
Step 3: Assign / Protect Content
Specify the Materials: Include resources such as downloadable files, videos, and WordPress content. You can include one or more pieces of content with your free product.

Downloadable Resources
- Templates, PDFs, Checklists, Worksheets
Media Resources
- Videos, Audio Files
WordPress Content
- WordPress Pages, Posts, Category Links, Custom Post Types
Structured Educational Content or Activities
- Courses, Challenges
Step 4: Delivery Options
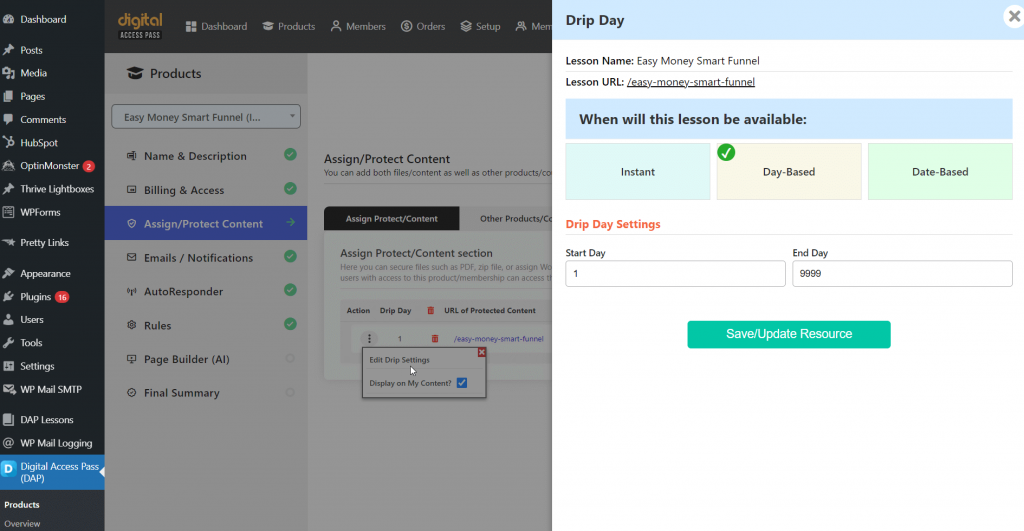
Decide on Content Delivery Method: Choose whether the content will be available immediately upon registration or released over time through drip-feeding. DAP offers flexible ways to deliver your digital products and courses to your audience. Select the option that best fits your content strategy:

- Instant Access: Content available immediately after registration.
- Dripped Content: Gradual content release over time.
- Lesson Completion: New content unlocked after completing a previous lesson.
- Time-Spent on Lesson: Access based on the time spent on a lesson.
- Blocking Based on Quiz Results: Content unlocked upon passing a quiz.
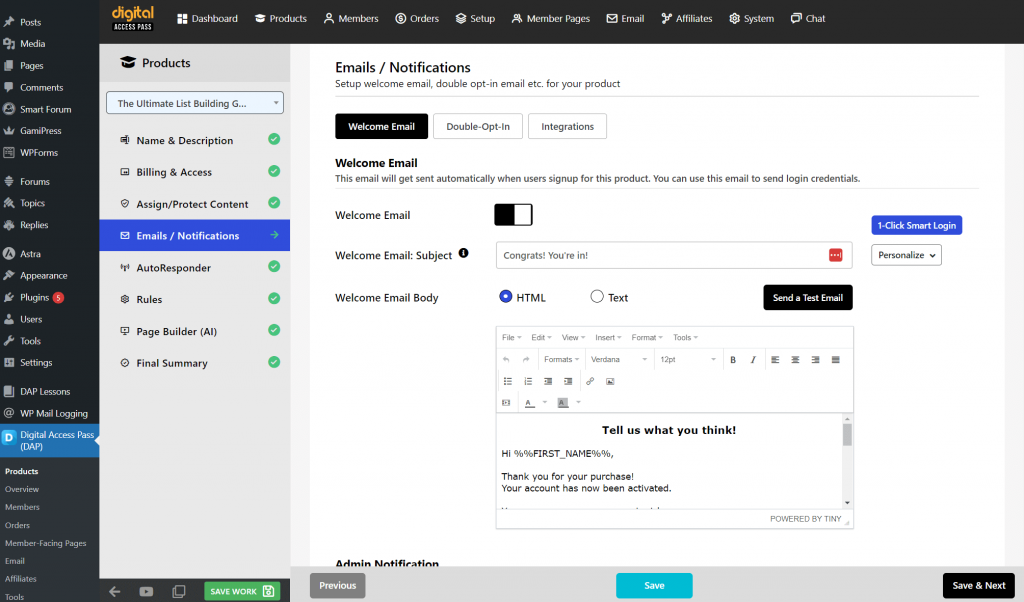
Step 5: Notifications
- Create a Welcome Email: Craft a warm and informative welcome email for new members. This email should include login details, an introduction to the product, and guidance on how to get started.
- Set Up Automations: Connect your product to your email platform, ensuring that new members are automatically added to the appropriate email lists for ongoing communication and engagement. You can do this step later. You can setup automations in DAP Products > Manage Automations page after you create the product.

Step 6: Registration Form
To allow users to sign up for your free product, create a registration form using DAP’s Form Builder.
Steps to Create a Registration Form:
- Navigate to the Form Builder:
- Log in to your DAP admin panel.
- Go to the Products menu and select Form Builder.
- Create a New Signup Form:
- Click on Create a New Form.
- Select the product.
- Configure the Form Settings:
- Set up a Redirect URL to direct users after they complete the signup process.
- Customize the form fields to capture necessary information, such as the user’s first name and email address.
- Publish the Form:
- After creating the form, a shortcode will be generated.
- Place this shortcode on your opt-in page.
Access Control
Ensure users can register for the free product and receive access details via the welcome email.
Step 7: Rules
Configure essential settings for your product, including login URLs, landing pages after login, and links to your opt-in page. These configurations will streamline access for your members.
Here are the settings:
- Post-Login URL: Configure where members should be redirected when they log in. The product-level post-login will ONLY work if the user has access to just 1 product. If the user has access to multiple products, the global post-login URL set under DAP setup -> config will be used.
- Access Content Button URL: Each logged-in member will see a product box for every product they have access to. Under each product box, there’s an “Access Content” button that directs users to the available resources for that product. You have full control over where this button leads.
- Error Page URL: Configure a global error page or unique error pages for each product for users who don’t have access. This system ensures users receive relevant messaging while guiding them on how to unlock premium content.
Step 8: Email Platform Automations
Set up automations to connect your product to your email platform, ensuring that new members are automatically added to the appropriate email lists for ongoing communication and engagement. You can setup automations in DAP Products > Manage Automations page after you create the product.
Congrats! Your Free Product is Ready!
Next Steps?
- Create an Opt-In Page in WordPress.
- Publish it on Your Opt-In Page.
- Test everything before you go live! Complete a registration like your users would, check the welcome email, log in, and see if you can access the content! If all looks good, you are all set!
Page Builder
DAP comes with a page builder. You can use it to create a landing page for your free product but this is optional. You can directly create your opt-in page in WordPress. You don’t have to use DAP’s page builder. If you want to create the opt-in page directly in WordPress, simply enter the opt-in page URL in the DAP Product Builder > Page Builder tab.


