Are you looking to offer ongoing access to valuable resources, courses, and products as part of a membership?
Creating a membership offer is a powerful way to engage your audience, deliver exclusive content, and build long-term relationships with your customers.
Digital Product & Membership Tier
A digital product or membership tier can consist of one or more resources. Each resource can be:
- A downloadable file (e.g., PDF, checklist, report)
- WordPress content (e.g., posts, pages, or any WP content)
- Another Product or Course
It’s easy to do all of this in DAP!
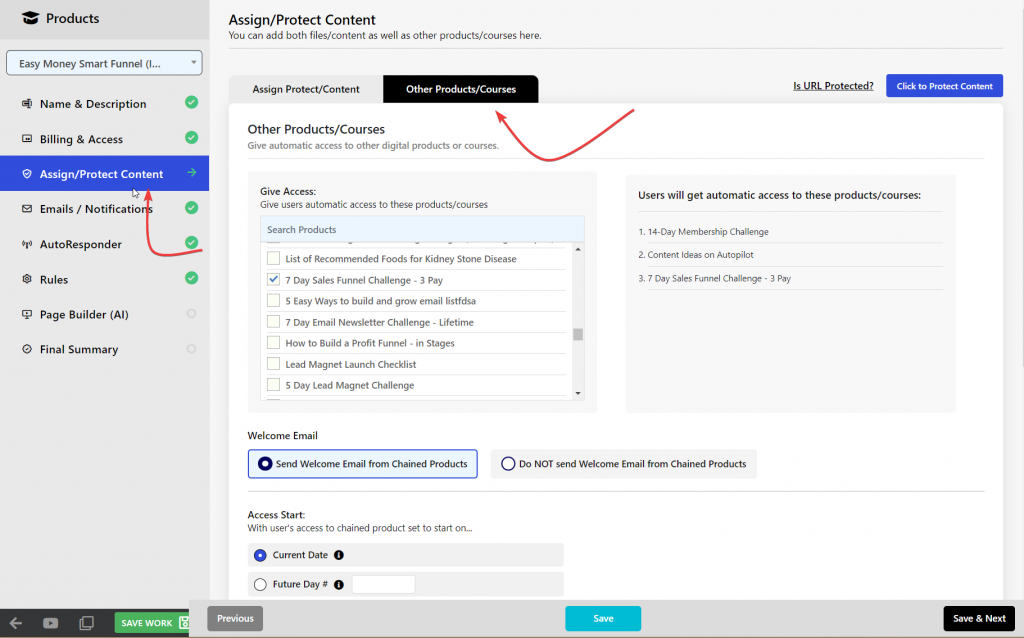
You can manage this in the DAP Product Builder under the “Assign/Protect Content” section!
How to set up your membership offer:
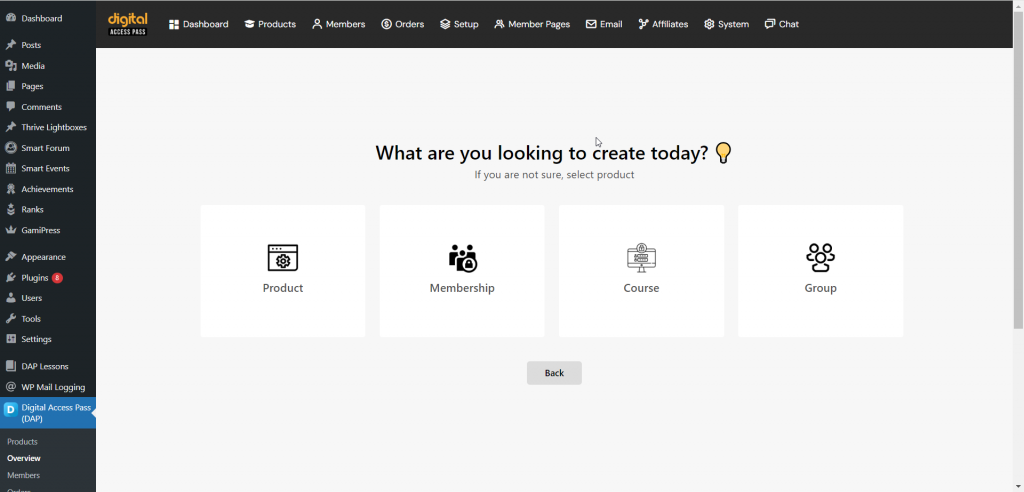
➡️ Step 1: Create a New Membership
Navigate to the DAP Products Page.
Click on “Create NEW”.
Select Membership.
Enter Title, Description & Upload an Image.
➡️ Step 2: Billing & Access
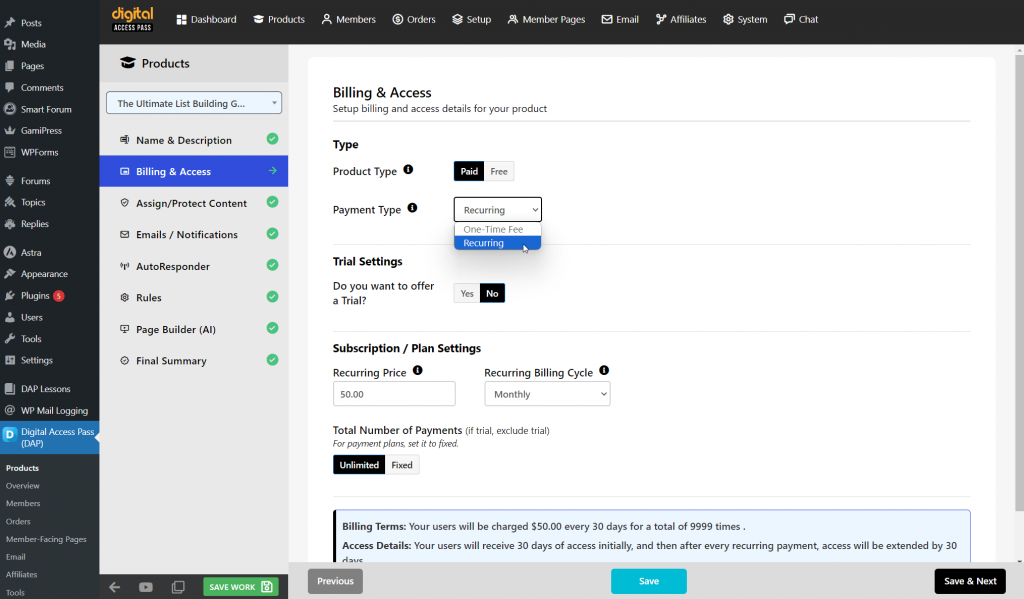
You can set your pricing as a one-time payment or subscription. Setup subscription details for your membership offer – price, billing cycle, trial details, etc.
➡️ Step 3: Assign Resources and Secure Content
This is where you control what your members can access.
- Assign specific resources such as videos, files, and posts to your membership.
- You can also grant access to additional courses or products at no extra charge.
You can also use different drip setting for each resource. DAP offers multiple delivery methods: choose whether to give immediate access or drip the content over time.
➡️ Step 4: Welcome Email / Notifications
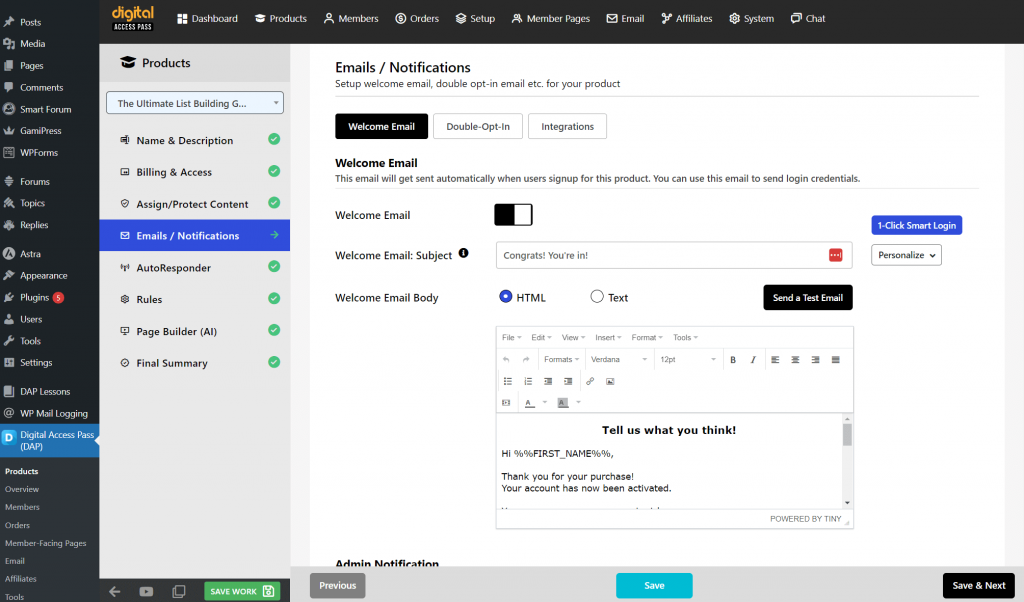
Create a customized welcome email that provides new members with login information and guidance on how to start accessing their resources.
➡️ Step 5: Follow-up Emails
You can use DAP to send out your follow-up emails but if you want to connect DAP to your email platform and send emails from your email platform, skip this step.
After you fully setup the product, you can go to DAP Products > Manage Automations page to setup email platform automation.
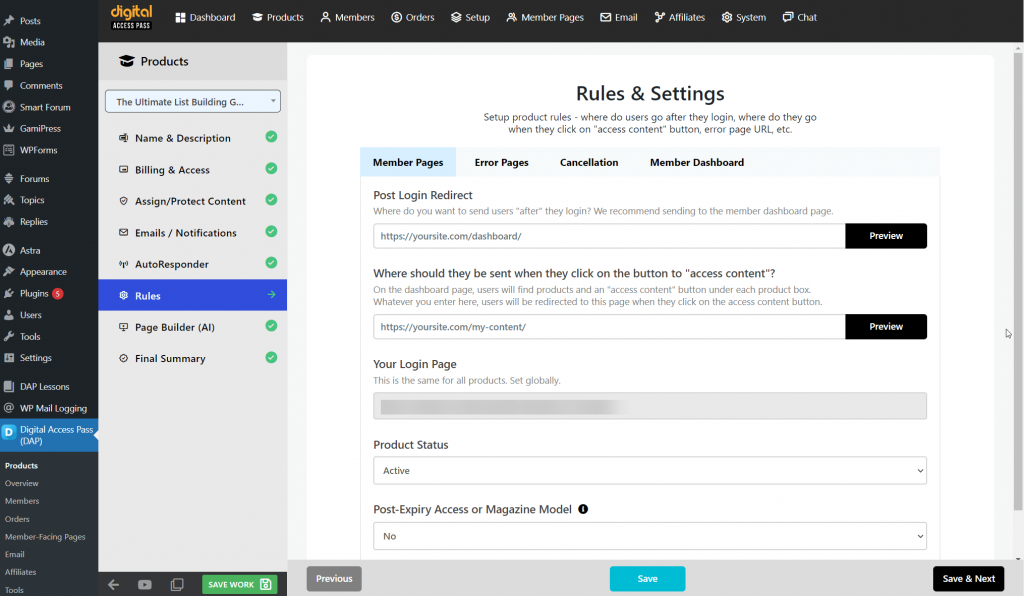
➡️ Step 6: Set Rules
Configure essential rules for your membership, such as redirecting to specific landing pages after login, and link to your content page for easy access.
➡️ Step 7: Sales Page Builder & Payment Button
Next, you need to create a sales page and publish a payment button.
You can create your sales page directly in WordPress. Or you can use DAP’s sales page builder to create your sales page.
You can use Smart Pay Cart (SPC), which is our shopping cart plugin for DAP, to create your checkout, payment buttons, integrate with PayPal, Stripe, Authorize.net, etc.
Congrats! You are all set!
You can test everything and if all looks good, you can go live with your membership offer!
Watch this video to learn:
- How to create membership levels.
- How to include different content, benefits with each tier.
- How to offer different membership plans.
- How to create a “content” product that holds the content that people can pay for in different ways (payment plan).
- How to create a beautiful, membership dashboard that wows your members and helps them easily find all their products/services from one centralized place!
Please note:
This video is part of my FREE course on membership sites. You can signup for the full course here.


