DAP supports webhook notifications for various events, allowing external systems to receive real-time updates when certain actions occur within DAP. These notifications are sent via HTTP POST requests to the target URL(s) you configure under DAP’s automation settings.
1. Setting Up a Webhook
To set up a webhook, ensure that your webhook URL is accessible via the internet and that it returns a 2xx HTTP status code when it receives a HEAD or POST request. Follow these steps to configure the webhook:
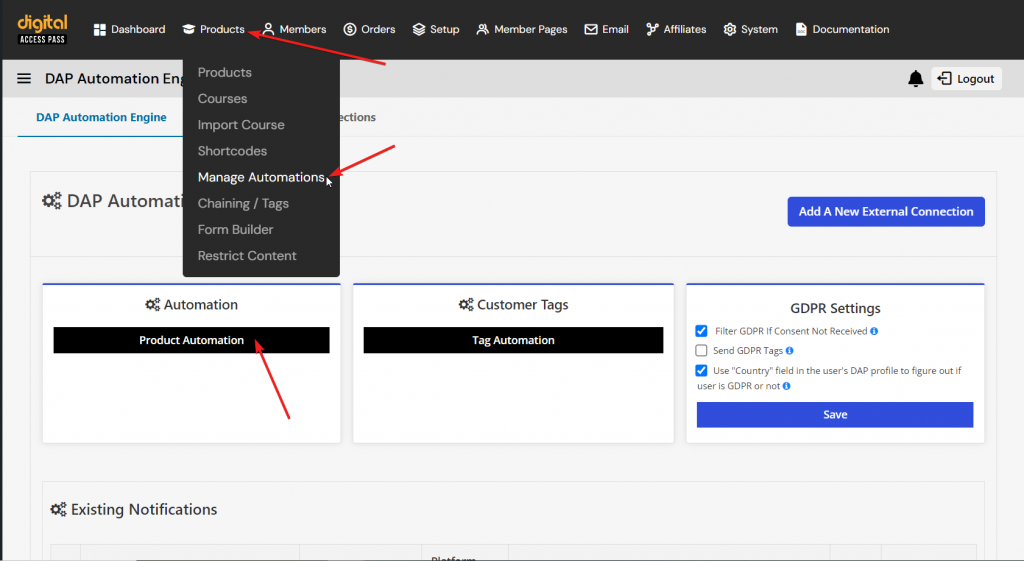
Step 1: Navigate to Product Automation.
In DAP, go to the Products menu, click on Manage Automations under Product Automation, and then click on the Product Automation button.
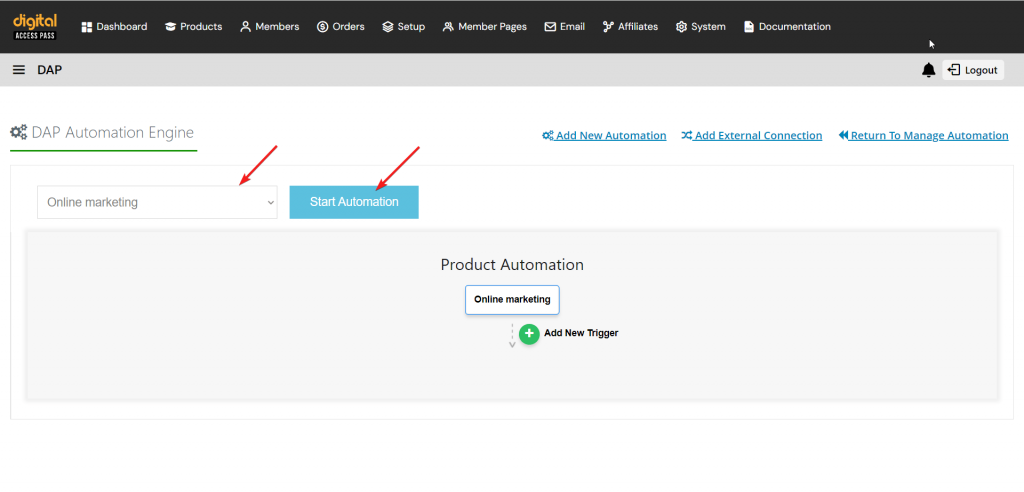
Step 2: Select the Product.
Select the product for which you want to configure webhook notifications. Once the product is selected, click on the Start Automation button.
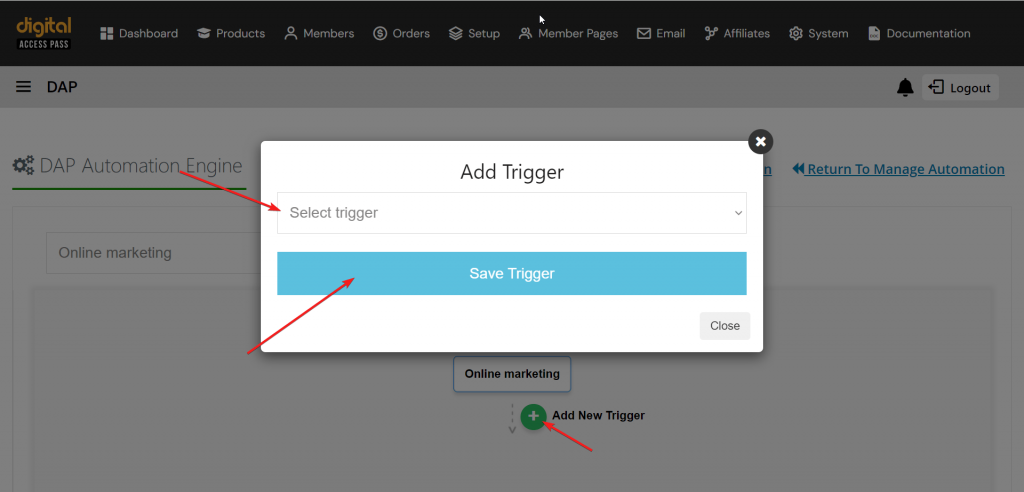
Step 3: Add a Trigger
Click on the Add a Trigger button. From the dropdown menu, select either User receives access to Product or User loses access to Product. This step defines whether the webhook should be called when a user receives or loses access to the product. After selecting the desired trigger, click on Save Trigger.
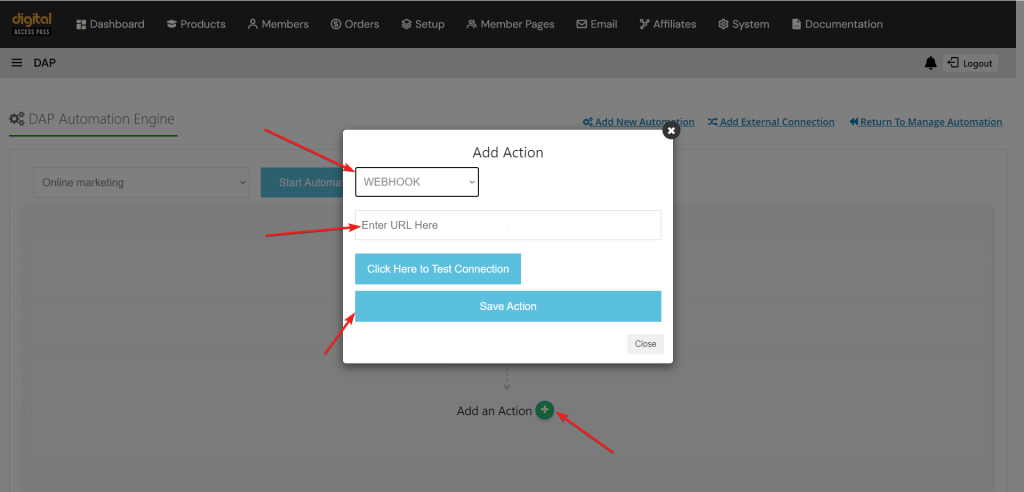
Step 4: Add an Action.
Click the Add an Action button. Select WEBHOOK as the destination, and then enter your webhook URL. After entering the URL, click on Click Here to Test Connection to verify the connection. Once confirmed, click on Save Action.
Step 5: Add Security (Optional)
To add authentication to your webhook, navigate to DAP > Setup > Config > Payment / Secret Key tab. Enter the Secret Authorization Key, which will be returned in the webhook response to verify authenticity.
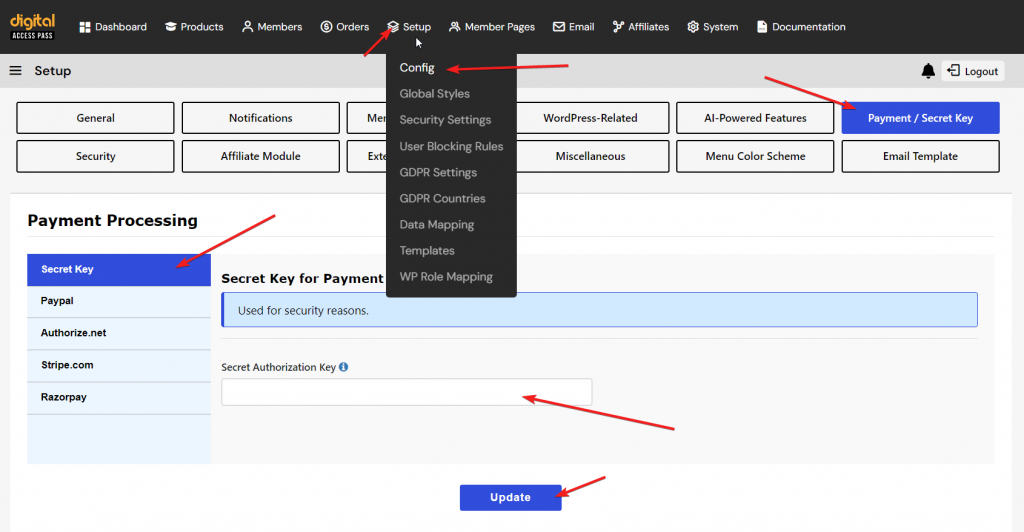
Note: Your secret key can be anything alphanumeric, which means you can use any combination of letters and numbers.
2. Testing the Webhook
After adding your webhook URL, DAP will start sending notifications whenever a user receives or loses access to the specified product/course. The notification includes the user’s details and other relevant data.
To test your webhook:
You can use services like webhook.site to generate a test URL, which logs all the data in an easily reviewable format.
3. Webhook Data Payload
When DAP sends a webhook notification, it provides the following information:
user_id– The unique ID of the user.user_name– The username of the user.first_name– The user’s first name.email– The user’s email address.productId– The ID of the product the user gained or lost access to.fields– Additional user information, such as:last_nameaddress1address2citystatezipcountryphonesecretKey– The secret authorization key if configured.
This data can be used by your custom scripts to handle actions like updating third-party systems, sending notifications, or performing any other business logic based on the event.


